Friday, September 24, 2010

Card Wallet

Happy Friday everyone.  I did not get around to posting yesterday.  I am not sure where the day went.  I had many, many errands for one thing.  I kind of let those pile up on me and then I make a day of it.  And it was a day; but productive.

I am so excited about today's posting.  This is another first for me.  I have always posted cards and this falls into the "anything but a card" category.  Let me give you some background on this project before I show it too you.  I am also going to have the tutorial for this for you.  My friend and fellow Rapid Stamper Club Member, Barbara Borthwick has been visiting family for the past two months, gasp!  Can you tell she's retired? :)  Anyway, while she was in California visiting one of her children, she went to a Stampin' Up class and made this project. I am calling it a card wallet.  I am sure it has another name, but alas, I don't know what it is.  I fell in love with it when she showed it to me.  I borrowed it from her; scrutinized it; measured it, etc., etc...  No, I did not take it apart!  And then I made one!!  I messed up the first time, forgot  something and had to start over.  Breathe, Terri!  So, I was more patient and didn't mess up this time!  I love the way it turned out!
Here is my card wallet:

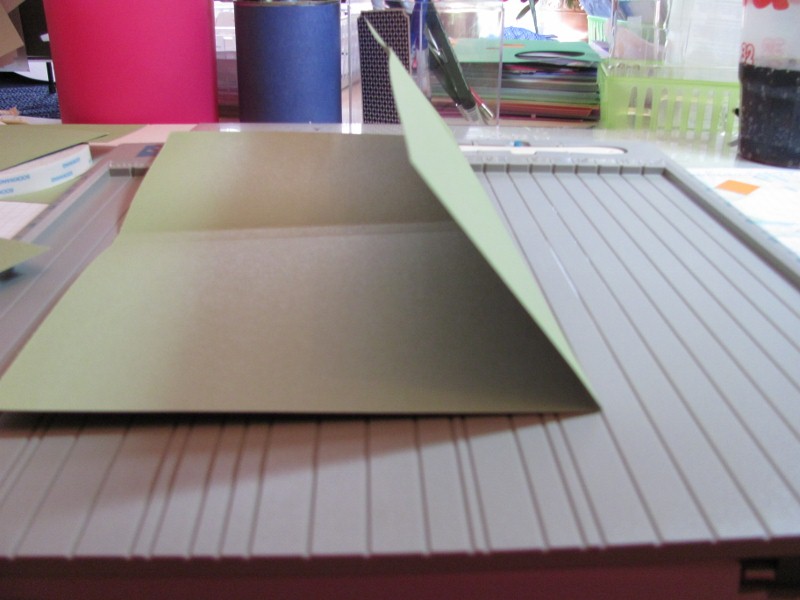
Here it is opened up.
Do you like it??   I love the way it turned out.  It will hold four cards; two in each pocket.  Maybe three if they don't have a lot of layers.  It was really easy to make.  I plan on making more.  Here are the directions!

There are two sheets to this project. 
Sheet 1 - is 12 x 10
Sheet 2 - is 8 1/2 x 6 6 1/2

Sheet 1 - on the 12" side:  score at 5 3/4, 6 1/4

If you are using Scor-Pal, there is no score line for 5 3/4". There's no line for it on the Scor-Pal.  But easy enough to do.  Just move your paper over 1/4 inch (Line it up with the quarter inch marks on the far right of the Scor pal.) It will then look like you are scoring at the 5 1/2, but you are not.  There is half an inch between scores, so the second score mark will look like you are scoring at 6, but it is really 6 1/4 since you have moved your paper over 1/4 inch.  Eazy Peazy.

Rotate your paper to the 10 inch side and score at 3 1/2

Sheet 2:
On the 8 1/2 inch side score at 5 3/4 and 6 1/4.  Adjust if using the Scor-Pal (noted above). 

Fold your score lines on sheet 1.  I folded the inside lines first, then folded the bottom score line.


Tape sheet 2 to the right side of sheet. (It should be taped to the outside of the 6 1/4 score line. Fold your score lines on sheet two.  This is the flap.
Add sticky strip to the outer bottom sides and the inner bottom between the score lines. I used 1/2 inch sticky strip to fit the inside and I used 1/4 inch sticky strips on the sides so it won't take up the needed room for your cards to fit inside.


After adding your sticky strip, fold the bottom half up. Refold your score lines down the center. and fold over.  You are almost finished.  You can decorate however you would like; add ribbon or not.  Use self adhesive velcro dots for the closure.  Here's the inside picture again, so you don't have to scroll to the top.

I also used 1/2 sticky strip to adhere my ribbon to the inside of the flap.
And here is the final product again:

Here are the items I used:

Paper:   Pear Pizzaz, 12x12 sheet and 81/2 x 11 sheet
              Early Espresso CS, and Greenhouse Gala DSP
Other:   Chocolate Chip Ribbon
             self adhesive velcro dots, sticky strip

I hope I didn't confuse you too much!  If you have any questions, please fee free to email me!

Have a wonderful weekend!

No comments:

Post a Comment